Welcome to the new year (well—about halfway through January, anyway)! If you’ve been scrolling social media lately, you’ve probably noticed a big trend: people are creating vision boards for 2026. Let’s recreate this idea in Canva
Vision boards are a powerful way to visualize goals, dreams, and the kind of life you want to build—and thanks to Canva, you can create one digitally in just a few simple steps. In this guide, I’ll walk you through how to make a digital vision board in Canva, step by step, even if you’ve never designed anything before.
LET’S GET STARTED
The first thing you’ll want to do is create a new design in Canva. Canva offers a wide variety of layouts and sizes to choose from, but for a digital vision board, starting with a basic presentation in landscape format works best. This gives you plenty of space to organize images, text, and ideas without feeling crowded.
Once you select a presentation in landscape format, Canva will open a blank canvas like the one shown below. Don’t worry if it feels empty at first—this space is where you’ll start layering images, text, and inspiration to create your digital vision board.

Now that your canvas is ready, it’s time to start adding visuals that represent your goals and the life you want to build. Intentionality is everything when making designs like these.
Canva offers a wide range of free templates and tools for beginners!
CHOOSING IMAGES THAT REPRESENT YOUR GOALS
Next, Canva has one of the largest collections of free graphics and photos available in any design platform, making it perfect for creatives who need extra inspiration or don’t want to create every element from scratch.
In Canva, you can add visuals to your vision board in two main ways: using Canva’s built-in graphic library or uploading your own photos and elements. You can find these resources in the Elements tab, or use Uploads if you’d like to add your own photos directly from your device.
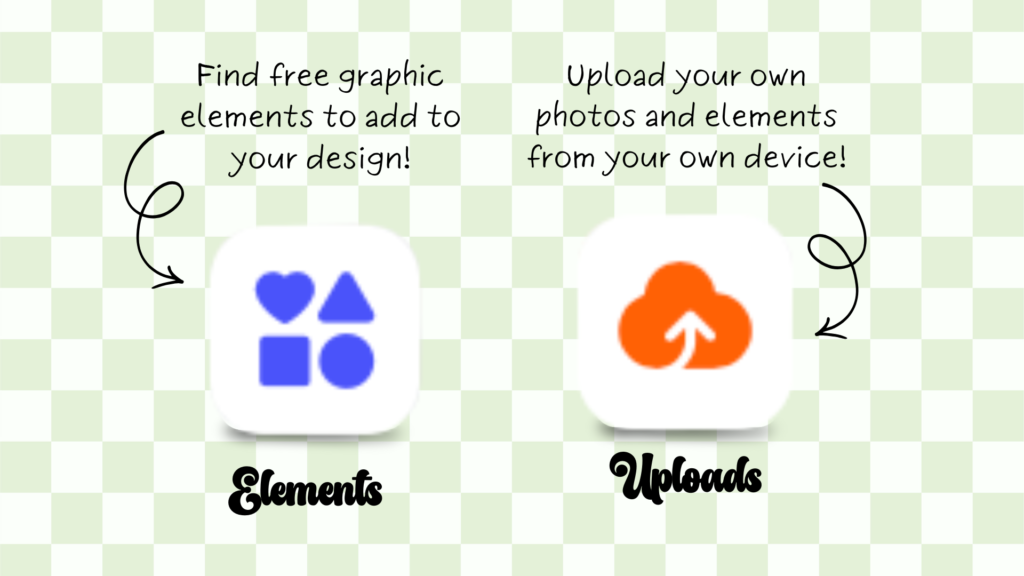
Whether you’re using Canva’s free elements or your own images, the goal is to choose visuals that reflect your intentions—not just what looks good.
NOW THE FUN PART: PUTTING YOUR VISION BOARD TOGETHER!
Finally it’s time to start assembling your vision board. Remember—no two vision boards will ever look the same, because everyone’s goals, values, and styles are different. That’s part of what makes this process meaningful.
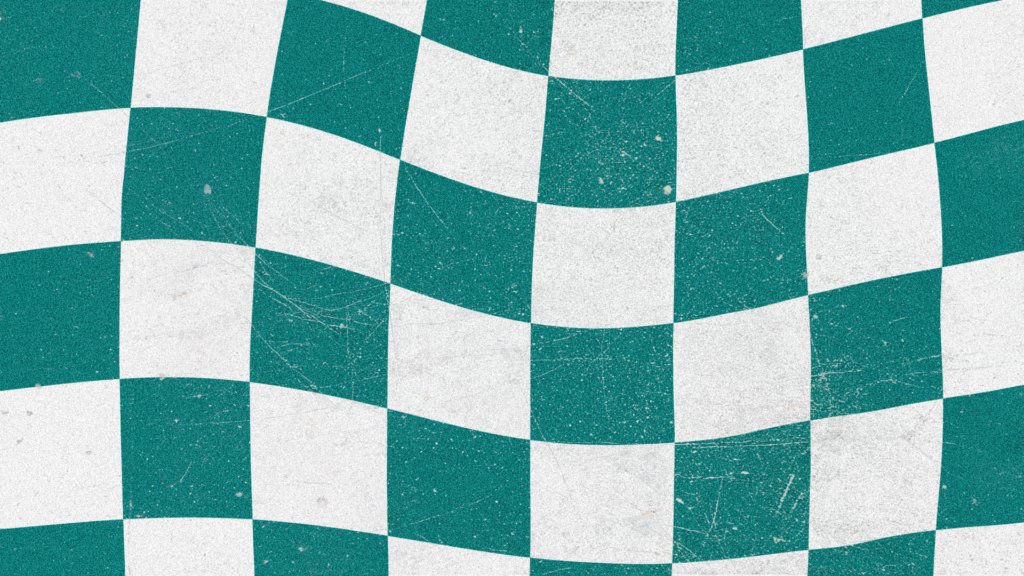
First, I like to begin with a background. In visual design, the background acts as the foundation of the entire piece—it sets the tone and supports everything layered on top of it. A good background should reflect your overall style without being so busy that it distracts from the images and words representing your goals.
For my vision board, I chose a bright, retro-inspired background that reflects my love for color. I also added subtle texture to create contrast. Because of this, individual elements stand out while keeping the design cohesive.
Note: The teal blue warped checker background shown here is one I created myself in Procreate. I’ll be sharing more about creating custom elements like this soon.
LAYER YOUR IMAGES AND TEXT
With your background set, it’s time to start layering your images and text together to build your digital vision board. Begin by placing your larger images first—these act as anchor points and help define the overall layout of your design.
Next, once your main visuals are in place, start adding smaller images, icons, and text around them. Canva makes this easy with snap-to-grid guides and alignment tools that help keep everything balanced, even if you don’t have design experience.
HOW TO LAYER WITHOUT OVERWHELMING YOUR DESIGN
To keep your vision board clean and intentional:
- Place images in a loose grid or natural flow across the canvas
- Avoid stacking too many visuals in one area
- Let your background show through where possible
If the board starts to feel crowded, remove one or two elements. A strong vision board doesn’t need to show everything—just what matters most.
USE SIZE AND PLACEMENT INTENTIONALLY
Not every image needs equal attention. Use size and placement to guide the eye:
- Larger images = higher priority goals
- Smaller images = supporting ideas or habits
- Center or top placement draws focus
- Edge placement can frame the design
With these notes in mind, this subtle hierarchy helps your vision board feel purposeful rather than random.
TRUST THE PROCESS
This part can take time and that’s okay. Move things around. Resize. Delete. Add back. Your digital vision board should feel inspiring, not stressful.
If something doesn’t feel right, listen to that instinct. You can always come back and refine it later. Layering images and text thoughtfully is what turns a Canva design into a cohesive digital vision board that reflects your goals.
SAVE, USE AND REVISIT YOUR DOWNLOAD
Once your digital vision board feels complete, it’s time to save it and start using it in your everyday life. In Canva, click Share → Download, then choose a file type that works best for how you plan to use it.
There are plenty of ways to keep your vision board close and visible. You might save it to your camera roll, set it as your phone or desktop wallpaper, or print it to keep nearby as a daily reminder of your goals.
Your vision board doesn’t have to stay the same all year. One of the biggest benefits of creating a digital vision board in Canva is how easy it is to edit, adjust, and grow with you. You can revisit it anytime and update your goals over time!
Here’s a look at my personal digital vision board for this year, created using the same steps shared above!

GET TO CREATING!
If you’re looking for more beginner-friendly design resources, you can explore my free creative downloads here!
Leave a Reply